An ARP broadcast storm with a single, CenturyLink-provided all-in-one internet gateway was the final straw. The entire network would become unusable multiple times a day without warning. With multiple people trying to work from home, and others just trying to use the internet normally, it was time for a refresh. Here’s how I upgraded from a single WiFi-6 WAP/Gateway/Switch to a whole-home mesh system powered by eero.
The calm before the storm. Or, how it started: CenturyLink’s best install, and a lot of dead spots
CenturyLink (now Lumen) is essentially the only ISP available at this residence, but does offer surprisingly reliable 1G symmetrical Fiber to the Home (FTTH). As part of the basic service offering, they provided a relatively capable Greenwave C4000XG. The C4000 worked well enough for the first year or so, but had some serious limitations.
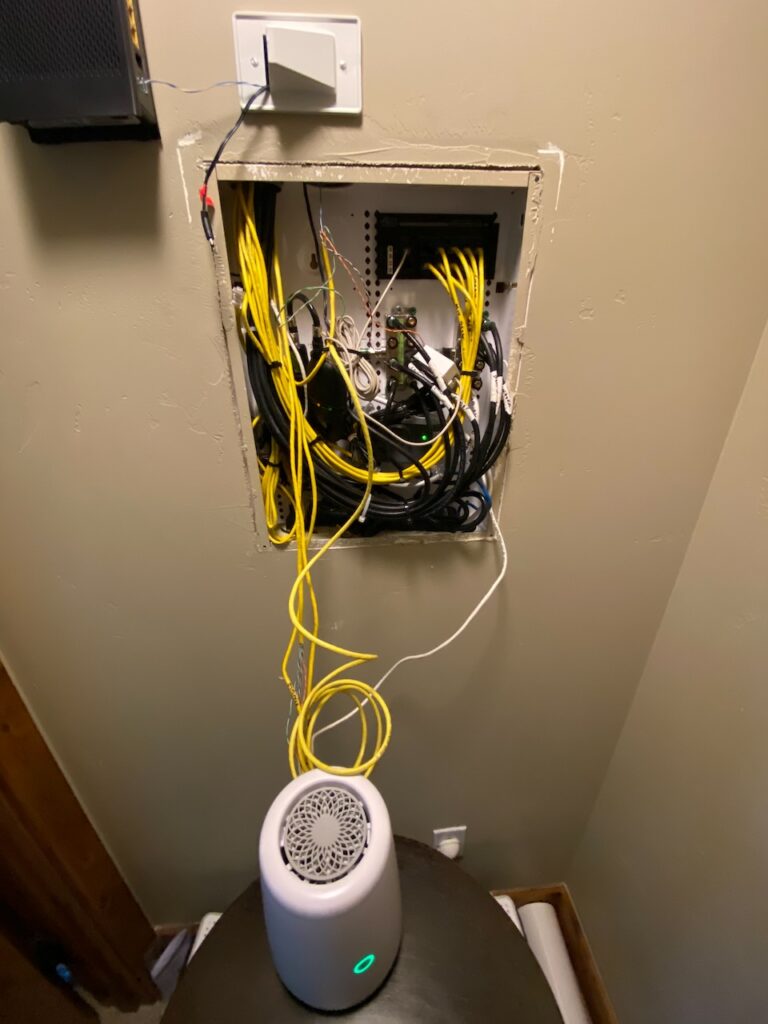
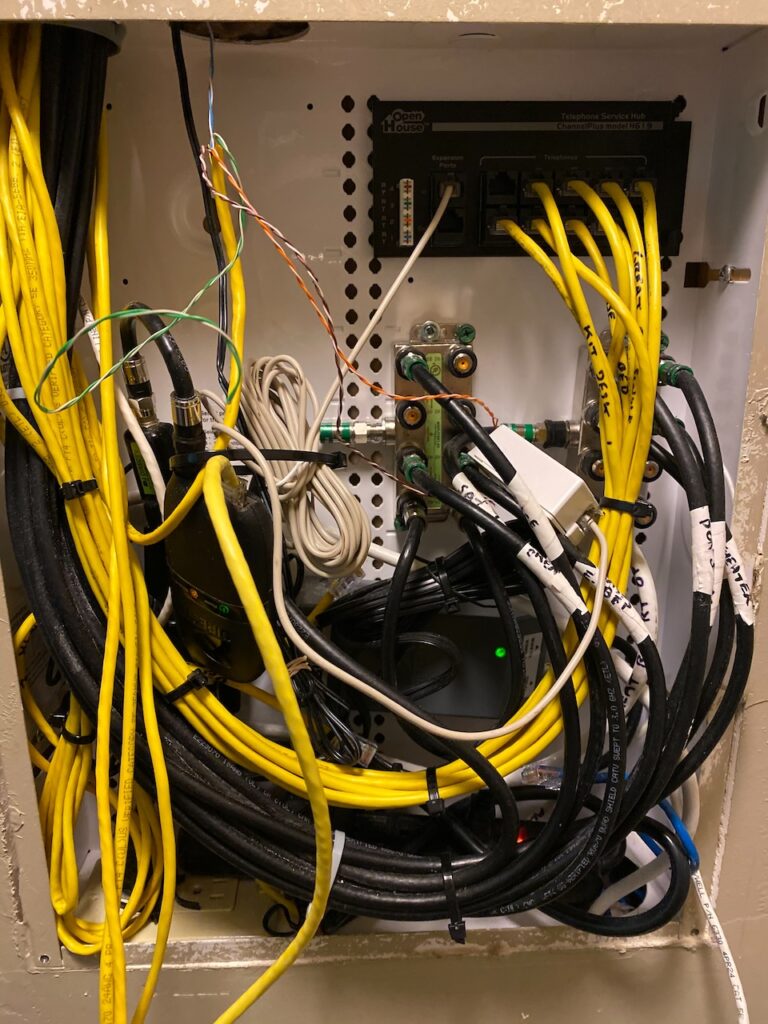
The nearly 5,000 sq. ft. multi-level home was anything but fully covered. In fact, only parts of the basement and some of the main floor had any WiFi coverage at all. The ONT is located in a utility box on the exterior of the house, with a nearly 300ft Cat 6 run to the basement. There, it is “terminated” in a residential in-wall enclosure (“terminated” is in quotes…the picture below shows why). It’s in here, deep in a closet in the lowest level of the three story structure that the C4000XG was placed by the CenturyLink technicians (to be fair, it’s the builder who ran the Cat 6 to this location originally).
Despite the builder and their low-voltage installers’ best effort to contain everything within the enclosure, here’s how the system was installed and left originally, once CenturyLink enabled the fiber service:
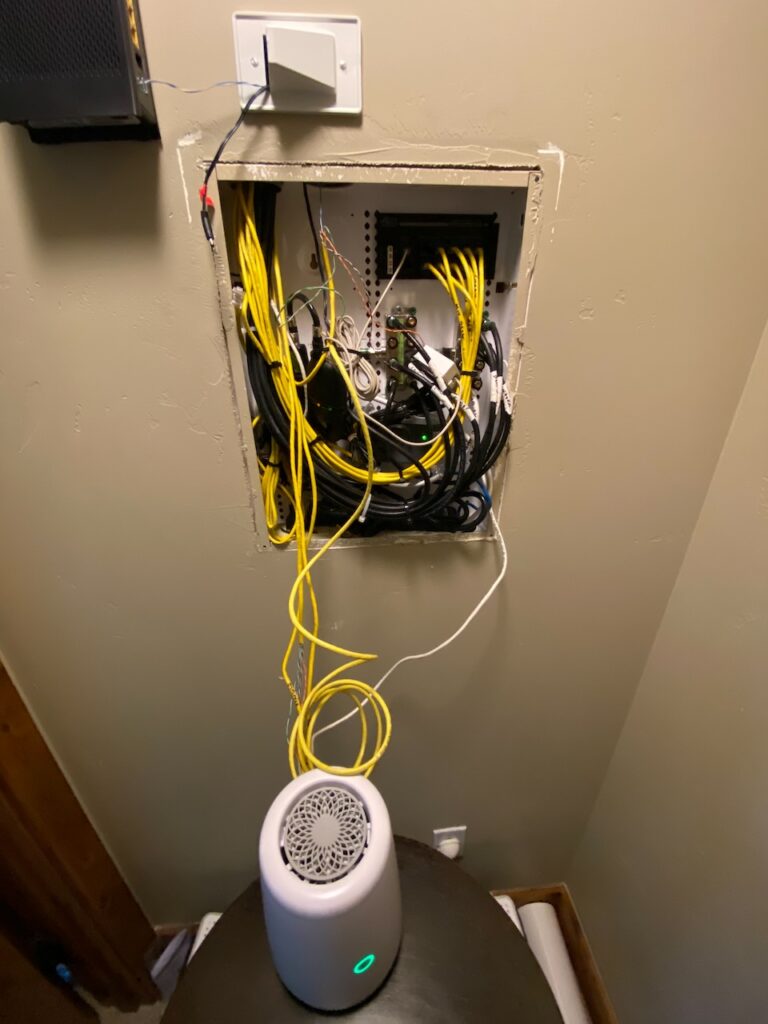
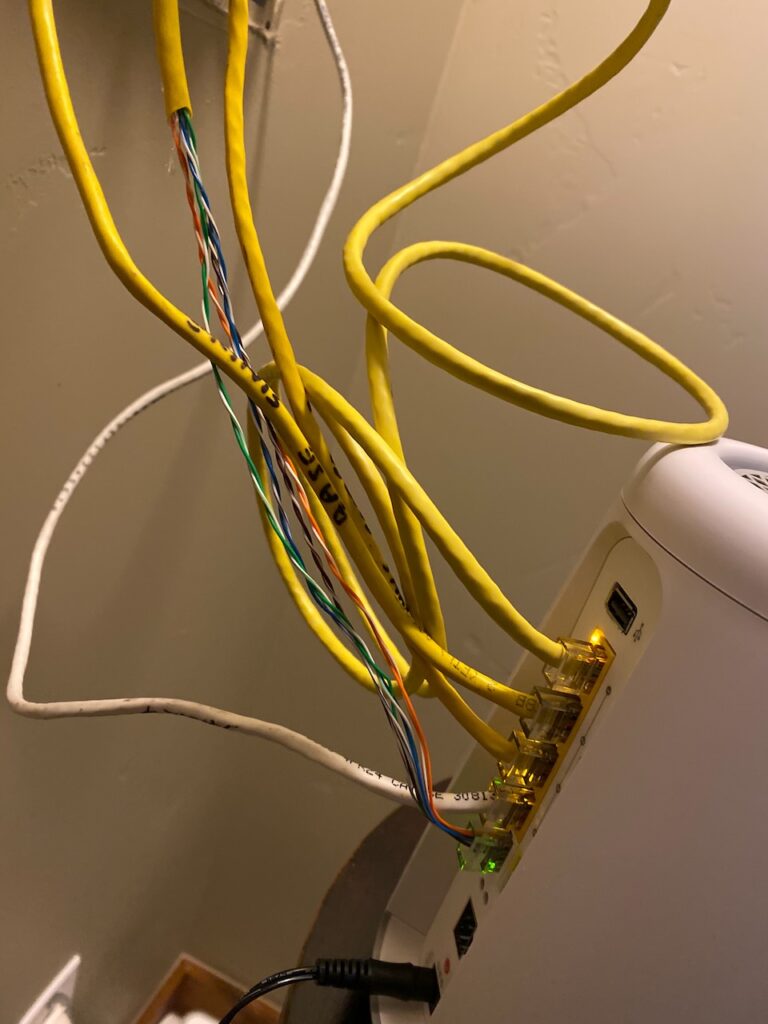
And yes…that’s really how the technician left it. Nearly a foot of untwisted, unshielded Cat 6. It’s incredible this system was left in place as long as it was.
The storm
While this system “worked” well enough for a few years, there were always limitations. For starters, most of the house had no WiFi coverage at all. And the parts that did, were essentially limited to weak 2.4GHz signals, due to the location of the C4000XG. Only when a device was within a few feet of the plastered closet did it attempt to negotiate on 5GHz.
Another problem, albeit first-world, had to do with in-home entertainment. Most of the rooms had in-wall speakers connected to Sonos Amps, and a few Apple TVs were scattered around the main living spaces. Weak wireless coverage meant using and managing these systems was never seamless. While the Sonos systems were hardwired directly to the C4000XG, it was impossible to control the patio speakers while on the patio for example.
An update
And then came the storm…
At some point in early 2023 CenturyLink was prompted to upgrade the C4000XG (this may have been due to known vulnerabilities in the firmware, an update/increase in the service provided, or something else…I don’t recall what triggered the upgrade, just that it wrecked havoc). Almost immediately after the firmware upgrade was complete, the network started to die randomly, sometimes multiple times a day.
Troubleshooting
Thinking we had a rogue device, we created a MAC deny list and started restricting devices. No change.
Maybe neighboring networks were causing interference? Thick exterior walls with stone and cement meant that was unlikely (and later wireless scans showed only minimal reception of neighboring networks).
Well then it has to be the Sonos system, right? Those six AMPs are wired in series using their own built-in hub. Surely that is related…right? Wrong. Fully disconnecting the Sonos system had no change on the network instability.
After multiple troubleshooting calls to CenturyLink, a new C4000XG (with the same firmware) was sent out, but the problem persisted. Fortunately, support believed we had an issue, as they could see the device fall offline on their end, but the logs showed the ports remained up and the device’s uptime wasn’t suspiciously low. So, off to Wireshark we go!
While I don’t have the captures saved, it became immediately clear what was happening. The C4000XG was ARP’ing itself to death. Essentially, the C4000XG was asking for the MAC of its own IP, which was the default gateway for the whole network. I assume this caused some sort of memory overload, triggering a service restart, but was never able to get useful logs from the device to check.
Fed up with the network constantly dropping out while multiple people worked (or at least tried to) from home, and sick of the lack of whole home coverage, I started to come up with a cost-effective, quick, and, most importantly, SIMPLE, solution.
We would ditch the C4000XG entirely, install additional WAPs, and take advantage of as many existing Cat 6 drops as possible.
New network, new requirements
As a network engineer by day, the ability to build out an entirely new network is a blessing and a curse. Of course I wanted to grab fully managed layer-3 switches, enterprise grade PoE WAPs, and a firewall. Would a Juniper EX2300-C or two, a half-dozen Aruba 550s, and a Palo PA-400 series do the trick? Well, yes…but I don’t want to work when I’m home. No, I want something that just works and can be managed by someone less tech-savvy in a pinch.
The build list
Wired & wireless devices
First things first, I needed to figure out what would be on this network.
In addition to phones, tablets, and laptops roaming around, there would be:
- a half dozen smart TVs
- two Apple TV 4Ks
- six Sonos AMPs
- two Sonos wireless speakers
- a video doorbell
- some wireless cameras
- a wireless printer
- Thread & UPnP support
All of this would be spread across two main levels, and a loft above a garage, far away from the original basement network enclosure. Some of the interior walls were lined with stone, and most were covered in plaster.
Some of the TVs and both of the Apple TVs could take advantage of existing Cat 6 (and some Cat 5E) cabling. The Sonos system would need one uplink port, as the AMPs had two ethernet ports each allowing them to be daisy-chained. Finally, there were enough existing Cat 6 drops in strategic locations that could be used for WAP home runs.
Shopping list
After a “site survey” of sorts, I came up with the following build list:
- 1x 8+ port “dumb” switch
- 1x eero Pro 6 (WiFi 6)
- 3x eero Pro (WiFi 5†)
- multiple RJ45 keystone jacks
- 1x 8 port keystone patch panel
- misc. patch cables in various lengths
† the decision to deploy mostly WiFi 5 APs came down to cost and reasonable expectations. In reality, while 1Gbps symmetrical service was possible, the purchased plan would only be 500Mbps up/down, and would be more than enough performance based on normal use. At the time of purchase, the cost to go all WiFi 6 was not worth it, and this system still allows for future upgrades. We’re on Zoom and streaming at most two 4K shows online…the bandwidth needs, both from a LAN and Internet perspective, are not significant.
Why eero?
There were two main reasons to go with eero. First, it’s incredibly easy to use and operate, even for someone with limited technical/network knowledge. They offer a decent mobile app that allows for remote monitoring/management and simple setup.
The APs purchased are all tri-band, and include dual 1Gbps ports. Each AP will utilize a home run back to the dumb switch on one port, leaving the second port available for things like the Apple TVs and smart TVs, or a workstation.
Additionally, I’ve found roaming on eero devices (“client steering”) to be reliable and seamless in the past, with good range and the ability to have a single SSID for both the 2.4GHz and 5GHz spectrums. UPnP and Thread†† support are additional bonuses.
Finally, the ability to see which devices are connected, and categorize them is useful. As is the built-in, automated speed test reporting.
†† Thread support only on the eero Pro 6 device
Final network design
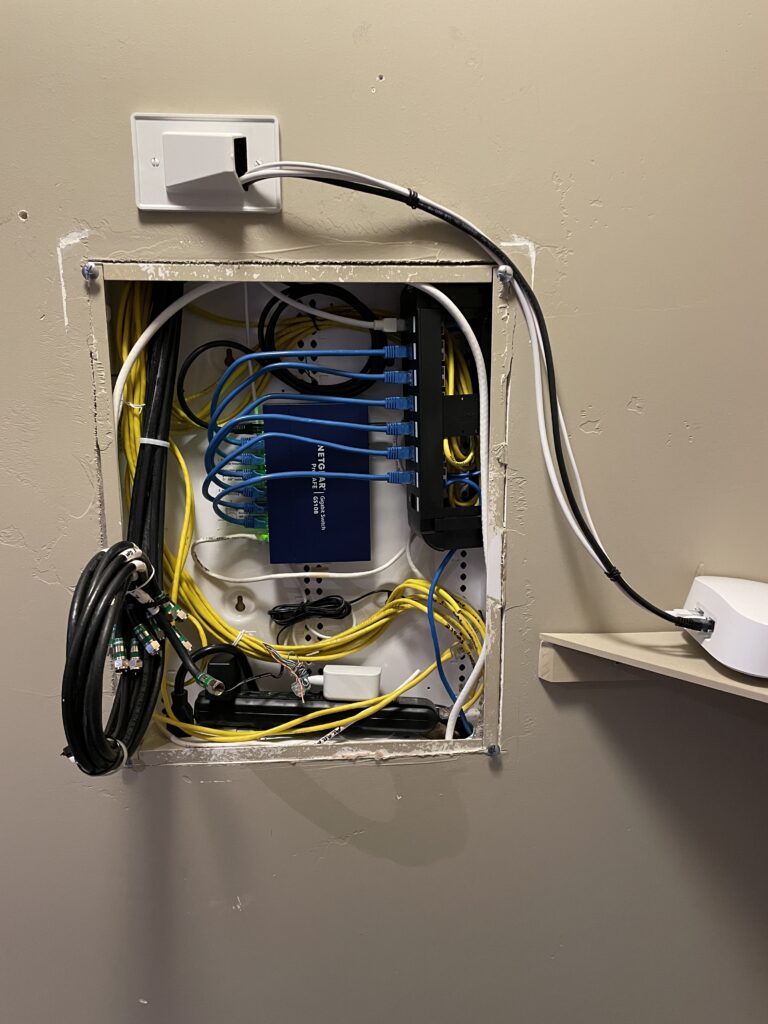
In the end, I went with a budget-friendly “dumb” switch, specifically a Netgear GS108. All of the eero devices, one of the Sonos AMPs, an Apple TV, and a workstation would all connect back to this switch.
The eero Pro 6 would act as our gateway device, specifically configured within the eero App to act as the default gateway and PPPoE device. The other eero Pros would provide extensive wireless coverage throughout the entire house, patio, garage, and driveway.
A basic draw.io diagram can be seen below.

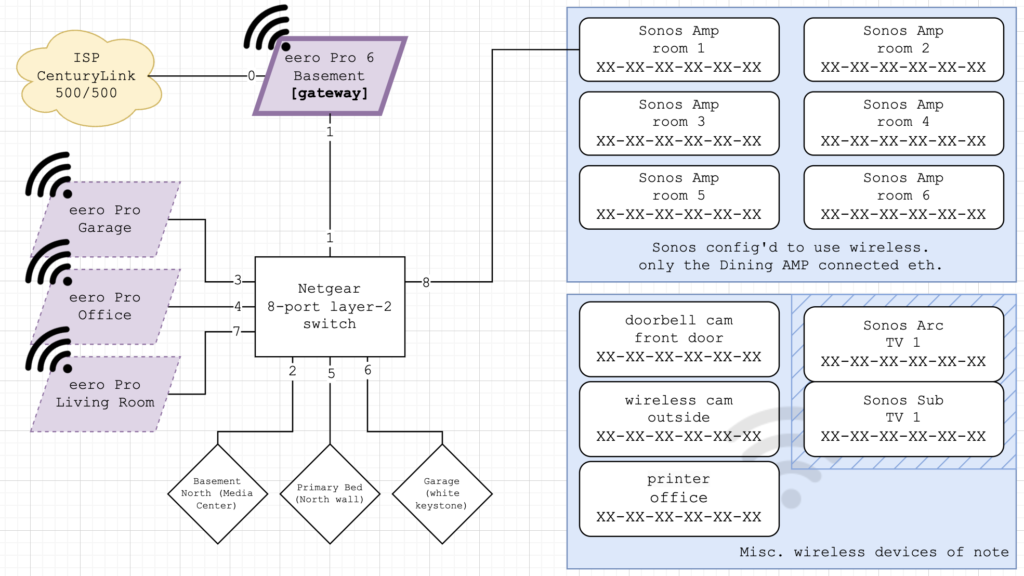
Did I need to mask the MACs? No. Did I do it anyways? Yes.
Of note, I’ve gone back and forth with how the Sonos systems are connected back to the network; connecting a single device via Cat 6 and letting the rest use their own wireless network vs daisy-chaining them all. So far, I think having only a single device connected via Cat 6 offered the best experience surprisingly. It has something to do with the AirPlay 2 performance being better this way.
All buttoned up
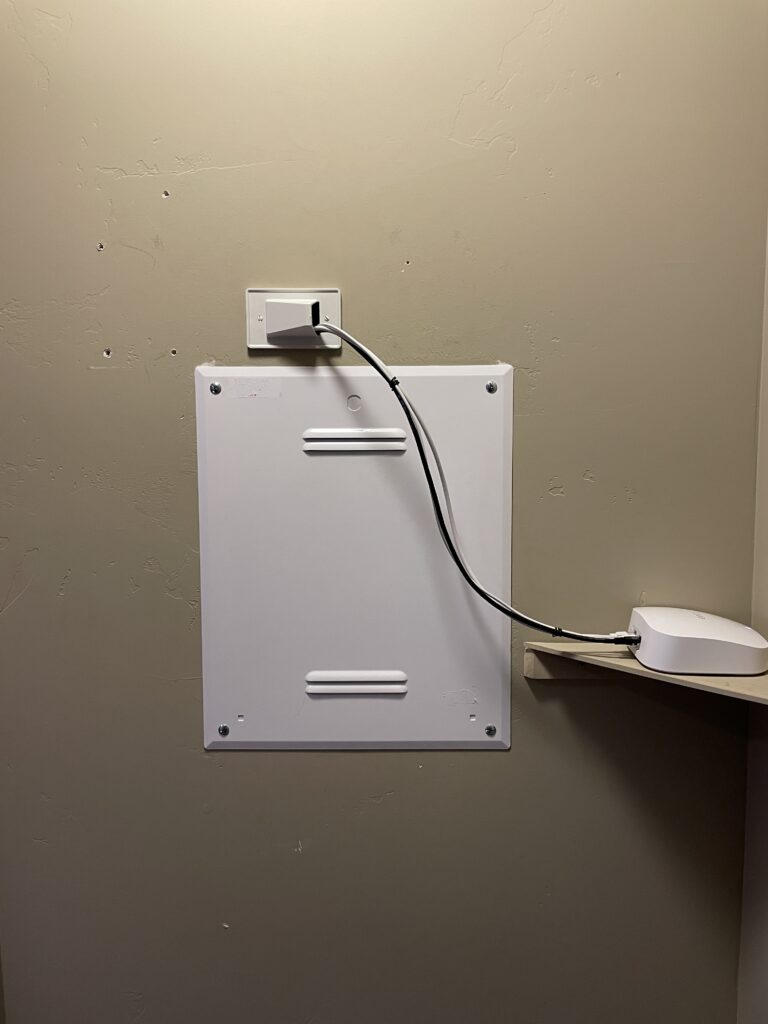
The idea here is to lock off as much as possible, while still allowing anyone to perform the single greatest troubleshooting step: yank the power. Therefore, I’ve contained as much of the connections within the enclosure as possible, and left the “gateway” eero (the lone eero Pro 6) accessible on the outside.
Ideally I would relocate the eero Pro 6 device to a better part of the house, where we can take advantage of its superior wireless capabilities. And while I could patch the incoming Cat 6 from the ONT to another drop within the house, I felt it was simpler to have it all in one, central location…an MDF of sorts. Plus, if I were to patch the WAN connection up to a different room and locate the eero Pro 6 there, I’d (ideally) still have to run it back to this enclosure via the second port to connect the switch.
When the house was first wired, coax was run to most rooms for satellite TV along with two Cat 5E drops. Typically, one Cat 5E drop was terminated RJ45 for network and one RJ11 for phone (leaving two pair unused). I was able to re-terminate a few of the RJ11 drops to RJ45 for additional network drops where necessary. The coax has been bundled up and left, but is no longer used. Existing coax splitters, coax power injectors, an RJ11 distribution block, and other miscellaneous gear was removed where possible to keep the enclosure as clean as possible.
